# Push Notifications
This page will describes how to enable and receive push notifications trough Mobile SDK for Android using Firebase Cloud Messaging.
# Setup Firebase project and Enable Google Service to Receive Push Notifications
# Step 1. Create Firebase Project and enable Google Services for you app
If you already have a Firebase project with enabled Google Services you can skip this section and continue with the next step. Otherwise go to Firebase Console (opens new window) and create a new project following these steps:
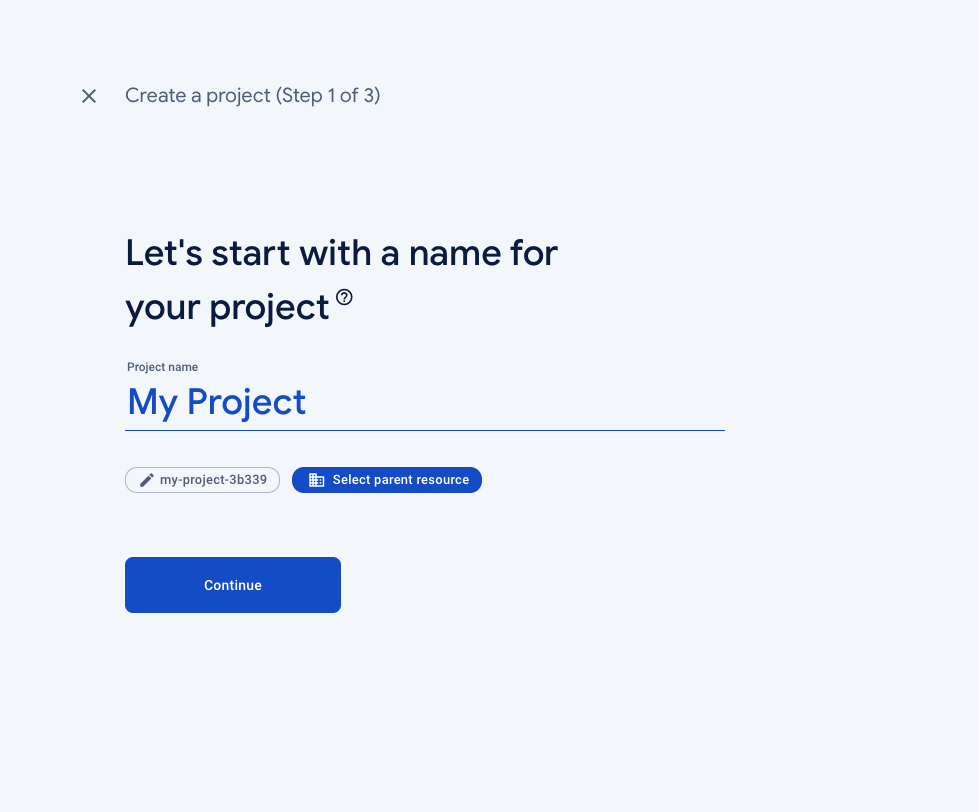
Step 1.1 - Create a new project:
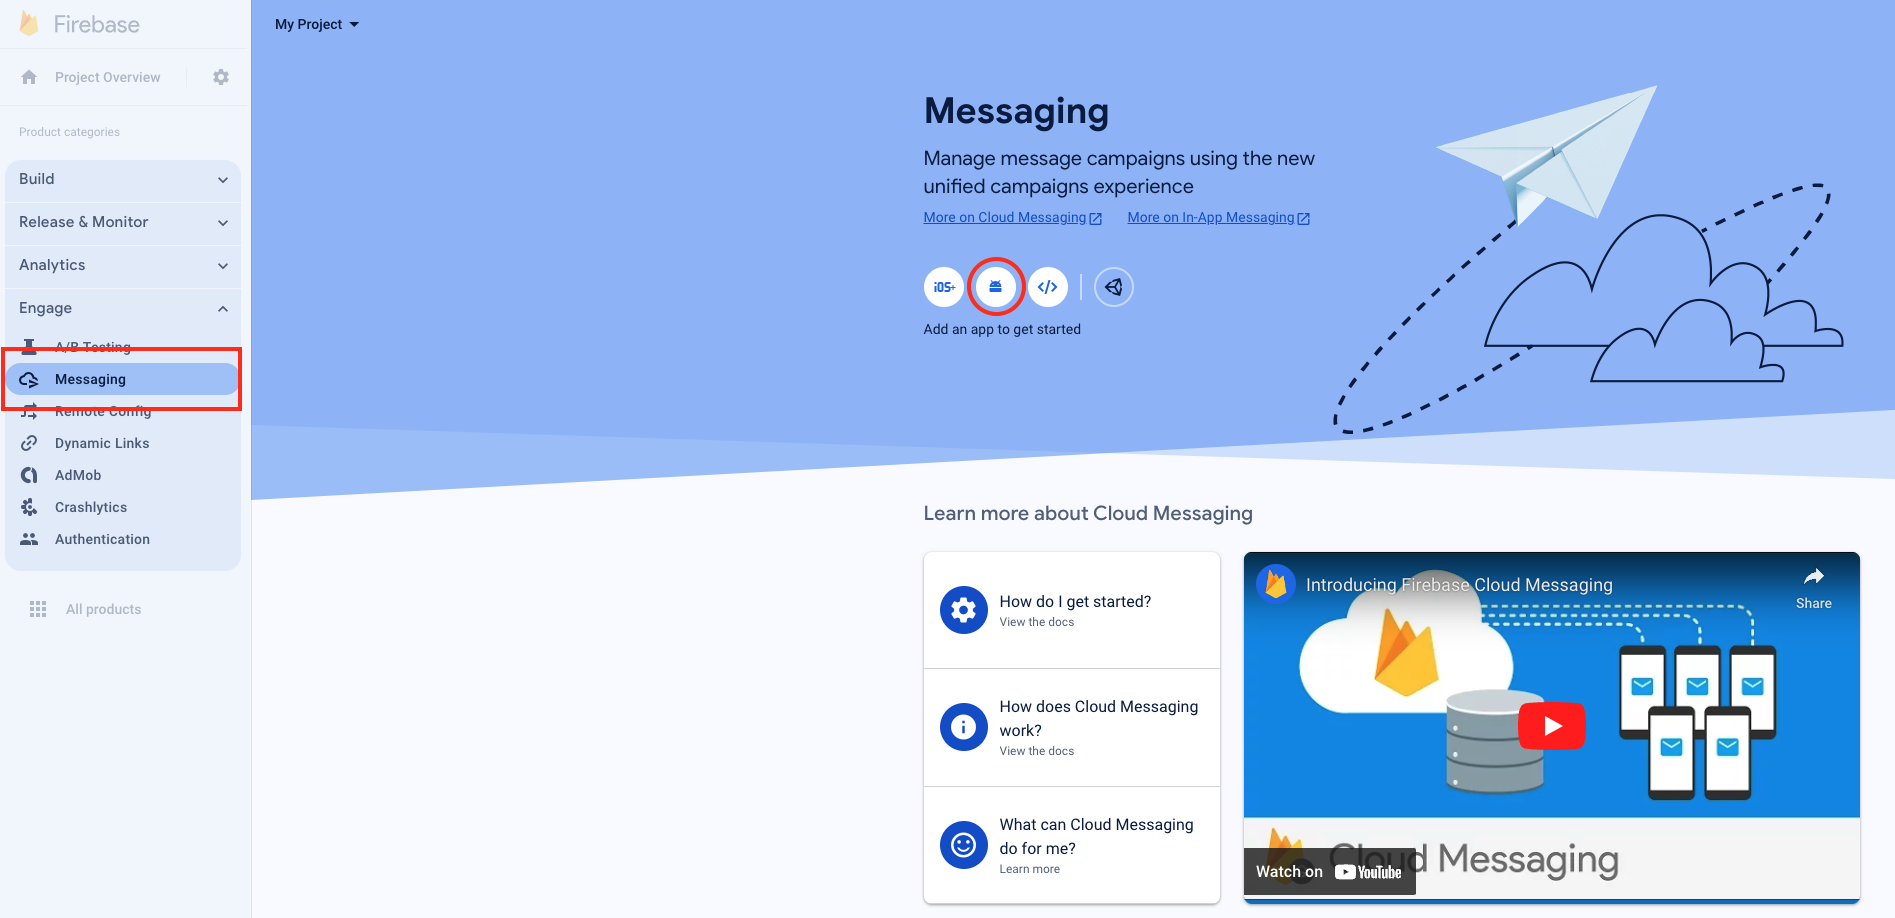
Step 1.2 - Go to Messaging and select Android:
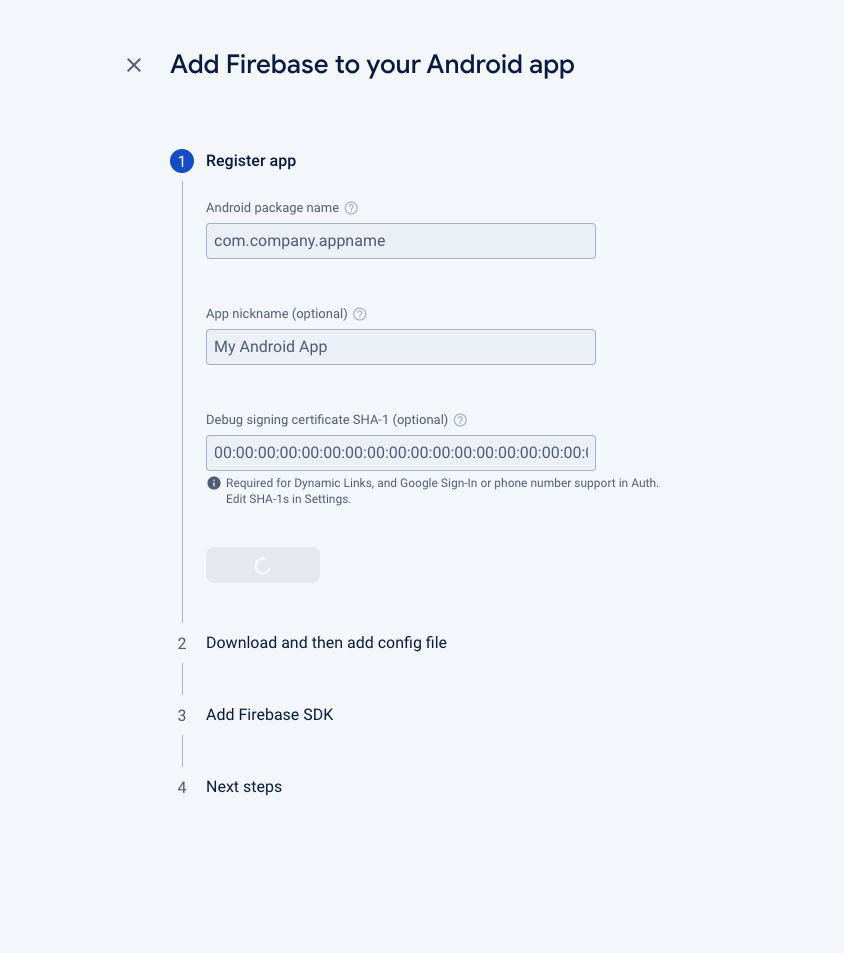
Step 1.3 - Register your app:
# Step 2. Setup your app to receive a push notifications
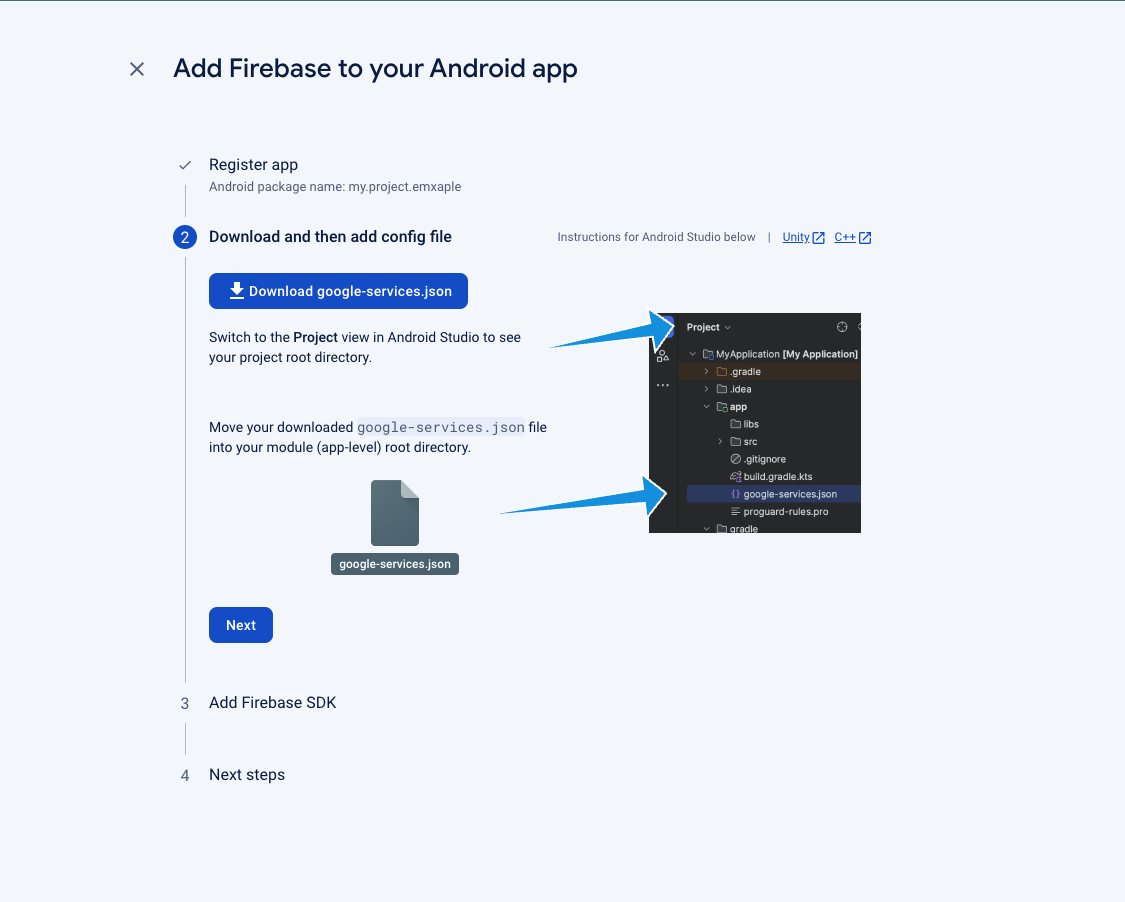
Step 2.1 - Download the google-services.json configuration file and move it into your module's (app-level) root directory.
Step 2.2 - Add Google Services and Firebase Cloud Messaging to your app.
In your root-level (project-level) Gradle file (
plugins {
  // ...
  id("com.google.gms.google-services") version "4.4.1" apply false
}
In your module (app-level) Gradle file (usually
plugins {
  // ...
  id("com.google.gms.google-services")
}
In your module (app-level) Gradle file (usually
dependencies {
  implementation("com.google.firebase:firebase-messaging:23.4.0")
}
# Step 3. Add your to Smartsupp SDK Android settings
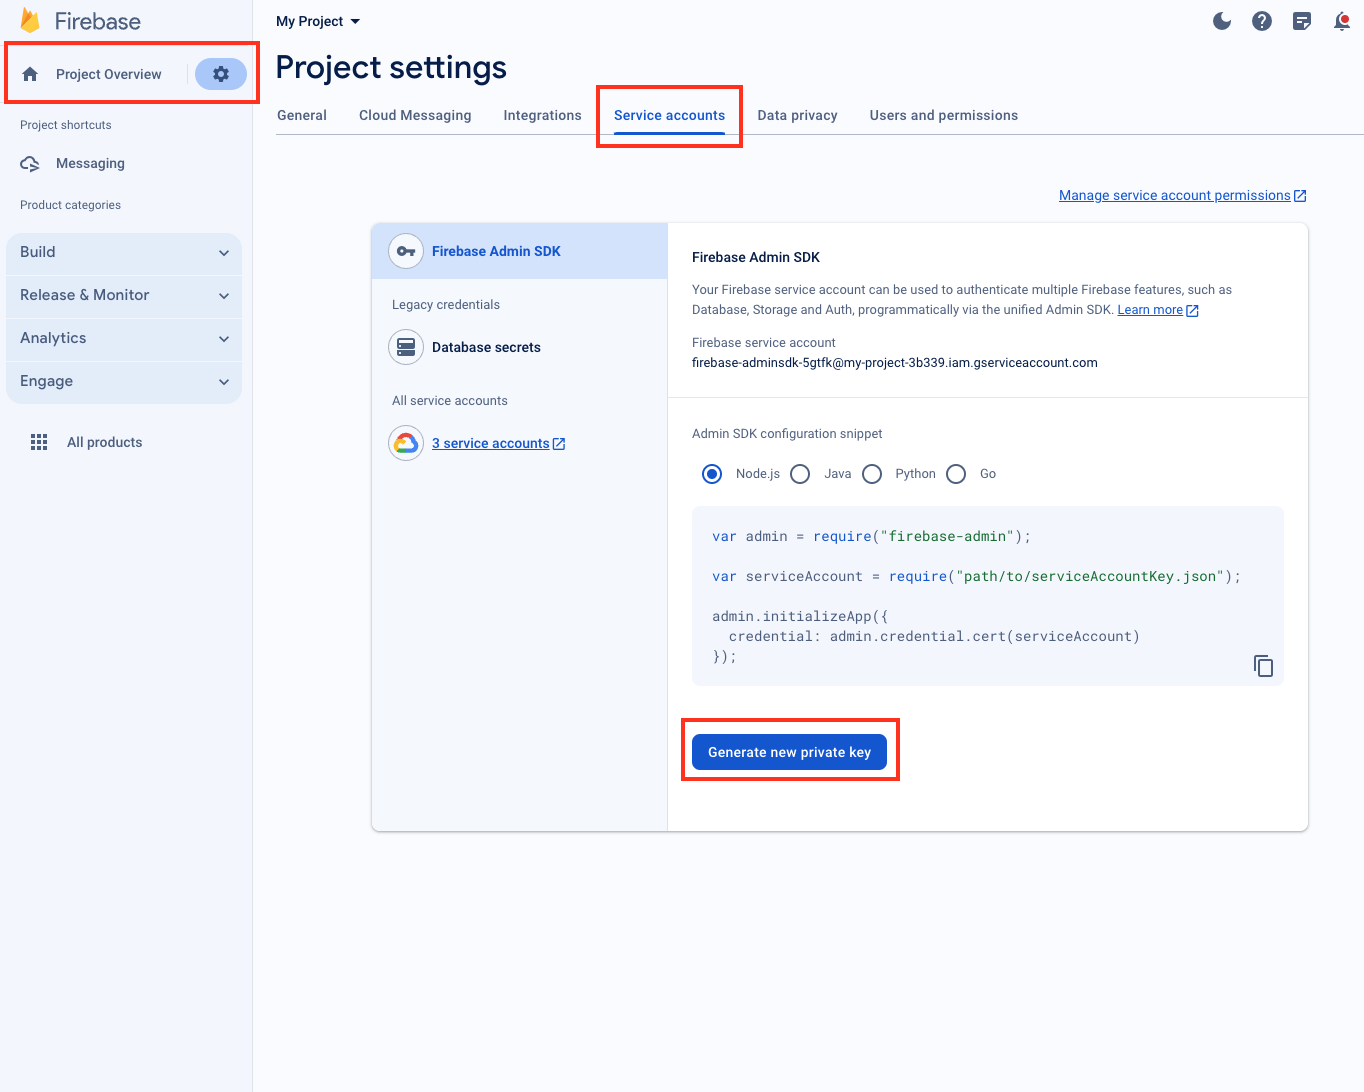
Step 3.1 - Go to Service Accounts in you Firebase project settings and Generate new private key. This will download a .json file.
Step 3.2 -
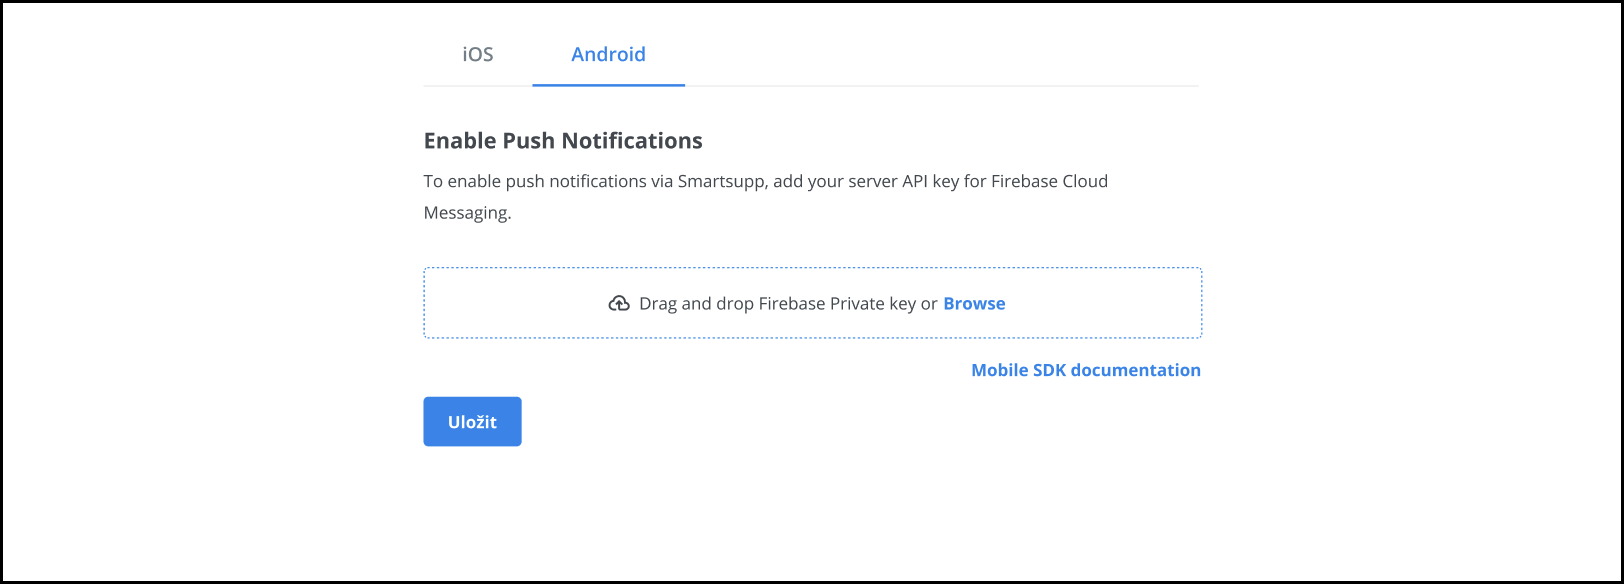
Then Go to Smartsupp Mobile SDK for Android settings (opens new window) and upload
your downloaded private key from Firebase to Smartsupp.
# Using Smartsupp Firebase Cloud Messaging setups
# Option 1. Default implementation
Smartsupp SDK for Android comes with default implementation of FirebaseMessagingService. This solution offers pre-defined implementation
for onNewToken and onMessageReceived methods.
# Option 2. Custom FCM Setup
If your application already utilizes FCM (Firebase Cloud Messaging), you'll need to update your implementation of FirebaseMessagingService
to correctly receive Smartsupp Push notifications.
You need to make two changes. First, in onMessageReceived, after you receive a message,
call SmartsuppPushMessageHandler.isSmartsuppPushMessage(RemoteMessage), which decides if the received message is from Smartsupp or not.
If the message returns true, then call SmartsuppPushMessageHandler.handlePushMessage(Context, RemoteMessage). To get
the SmartsuppPushMessageHandler instance, call SmartsuppPushMessageHandler.instance().
Custom TaskStackBuilder
If you want to create a custom back stack for received notifications, you can pass a TaskStackBuilder
into SmartsuppPushMessageHandler.handlePushMessage(Context, RemoteMessage, TaskStackBuilder).
Secondly, in onNewToken, call SmartsuppPushMessageHandler.updateToken(String), which will send the new token to Smartsupp.
The implementation can look like this:
class SampleAppPushNotificationService : FirebaseMessagingService() {

  private val smartsuppPushMessageHandler = SmartsuppPushMessageHandler.instance()

  override fun onMessageReceived(message: RemoteMessage) {
    super.onMessageReceived(message)

    if (smartsuppPushMessageHandler.isSmartsuppPushMessage(message)) {
      val taskStackBuilder = TaskStackBuilder.create(this)
      taskStackBuilder.addNextIntent(Intent(this, MainActivity::class.java))

      smartsuppPushMessageHandler.handlePushMessage(context = this, message = message, stackBuilder = taskStackBuilder)
    }
  }

  override fun onNewToken(token: String) {
    super.onNewToken(token)
    smartsuppPushMessageHandler.updateToken(token)
  }
}
# Set your Push Notification Icon
If you want to change notification icon simply add smartsupp_push_notification_icon.png to your drawable folder for all supported
densities (vector drawables cannot be used for notifications icon).
/res/drawable-xxhdpi/smartsupp_push_notification_icon.png
/res/drawable-xhdpi/smartsupp_push_notification_icon.png
/res/drawable-hdpi/smartsupp_push_notification_icon.png
/res/drawable-mdpi/smartsupp_push_notification_icon.png
# Push Notification Permission
From Android 13 and above, you should request permission to receive notifications. Firstly, add the permission to AndroidManifest.xml.
<manifest ...>
  <uses-permission android:name="android.permission.POST_NOTIFICATIONS"/>
  <application ...>
    ...
  </application>
</manifest>
Secondly, ask for permission in the appropriate situation. Create a launcher and then ask for permission. An example code can look like this:
registerForActivityResult(ActivityResultContracts.RequestPermission()) { isGranted ->
  if (isGranted) {
    // Handle granted permission
  }
}
The following code snippet demonstrates how to request a permission using a request code:
when {
  ContextCompat.checkSelfPermission(this, Manifest.permission.POST_NOTIFICATIONS) != PackageManager.PERMISSION_GRANTED -> {
    requestPermissionLauncher.launch(Manifest.permission.POST_NOTIFICATIONS)
  }

  shouldShowRequestPermissionRationale(Manifest.permission.POST_NOTIFICATIONS) -> {
    requestPermissionLauncher.launch(Manifest.permission.POST_NOTIFICATIONS)
  }

  else -> {
    // Permission is granted
  }
}
Asking for permission guidelines
For asking permission, check the official documentation (opens new window).